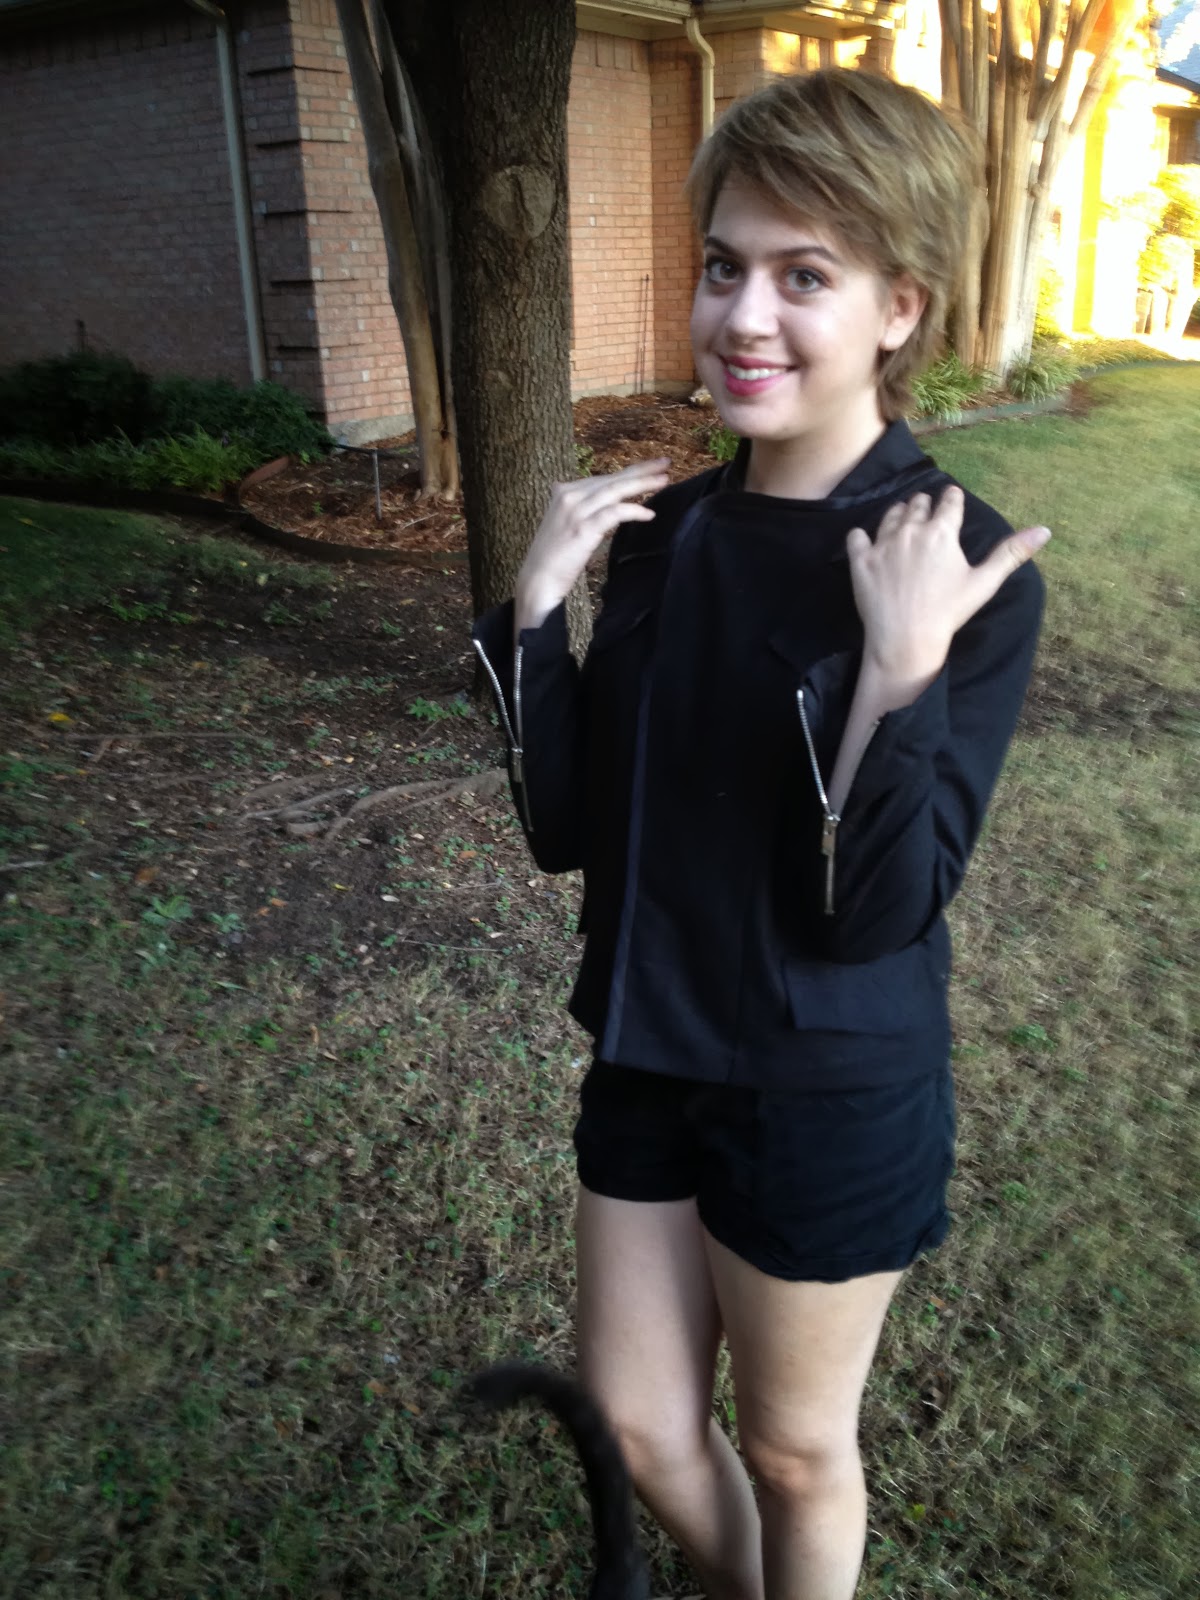
This is a partially lined black silk jacket from Burda's July 2013 issue. It is also a sewing course in the mag. It calls for Natte' fabric...what the heck? Hart's Black Silk Noil is what I used and it is quite nice. The shiny black binding is a black silk charmeuse also from Hart's.
I'm not sure I can do a proper review on this jacket, because I just don't do a lot of lined jackets. I live in Texas and it is not often that I even need outerwear. The jacket took more time than I expected but I think that is because I really needed better instructions than what the magazine offered. Burda mag instructions even on a sewing course is just confusing. I am so glad I did this jacket because it is one sexy beast. I made it for myself and the 17yo DD will not unhand it.
Here are a few pics on my dress form that is actually too big now. I have lost quite a bit of weight and my dress form is just a smidge too big now which is why the front does not meet in the pics. The weight loss is for health reasons, so all is good.
Double welt pockets with flaps! I loved making these.
OK, I did not make this jacket for her, but she is a greedy little thing and looks quite cute in it. I will put some thin shoulder pads in it for her. My shoulders are larger and more square than hers and it was made for ME. :)
Pattern adjustments and advice: When I made the muslin, the only change I made was to narrow the back at the center seam below the shoulder blades. I have a narrow back, so this is not unusual. Ditch the partial lining pieces and just redraft a full lining for this one. If you don't know how, I think there are a few good sites and books for this. (What I should have done). I also should have figured out how to miter corners before I tore into the binding issue. I just winged it and that is just not very satisfying. Burda does not cover this very well in the directions and I would look into this if you are not familiar with that.
This is downloadable on the Burdastyle website here.
Thanks for reading!
Claire
Thursday, September 26, 2013
Saturday, September 7, 2013
Sleeve Cap Ease - What to do!
Ok, I am patiently waiting for my little wheel to come in from the manufacturers. It had some glitches that had to be fixed. I have been so excited about having something to measure armholes and sleeve heads because frankly I have been skipping that bit of information when I prepare my patterns. Trying to hold a tape measure on a stitching line or one of those flexible rulers is a pain in the butt. Plus, as you know, I love me some European pattern drafting. Have you noticed that the big 4 has a lot of sleeve cap ease? I love knit tops and I'm sorry but you just shouldn't do a bunch of sleeve cap ease with knits. It is just wrong.
Here are some of the highlights of information that I found in short form:
Zero Ease:
Fashion Incubator: You do not need any ease if you are willing to redraft the sleeve head to be anatomically correct which is "difficult and time-consuming" Well, I guess I will do some ease then.
1/2 Inch to 1 1/2 Inches:
Madalynn has a lot of nice information on her blog about sleeve ease. I will make her info super short, so you may want to double check her blog.
1 to 1.5 inches of ease for Jackets
1/2"to 3/4" for knits
Less for leather
Silhouettes that need more ease are tailored jackets.
Silhouettes that need less ease are drop shoulder styles.
Very soft fabric may need less ease so it does not pucker.
I'll keep adding to this as I find more information. Feel free to comment and correct me if you want.
Do you drop the sleeve cap height to remove the ease or do you redraft the sleeve?
Have a lovely weekend!!
Claire
Here are some of the highlights of information that I found in short form:
Zero Ease:
Fashion Incubator: You do not need any ease if you are willing to redraft the sleeve head to be anatomically correct which is "difficult and time-consuming" Well, I guess I will do some ease then.
1/2 Inch to 1 1/2 Inches:
Madalynn has a lot of nice information on her blog about sleeve ease. I will make her info super short, so you may want to double check her blog.
1 to 1.5 inches of ease for Jackets
1/2"to 3/4" for knits
Less for leather
Silhouettes that need more ease are tailored jackets.
Silhouettes that need less ease are drop shoulder styles.
Very soft fabric may need less ease so it does not pucker.
I'll keep adding to this as I find more information. Feel free to comment and correct me if you want.
Do you drop the sleeve cap height to remove the ease or do you redraft the sleeve?
Have a lovely weekend!!
Claire
Thursday, August 22, 2013
June #111B 2013 Burdastyle Shorts and February Burdastyle top
OK, I'm short and I thought I could make me some stylishly baggy shorts that I spied in the Burdastyle June issue. They seriously need some long skinny legs, which I am not sporting. Anyway, I started at the hem and took one inch on either side and angled the straight ruler to the bottom of the hip area on the outside and the crotch on the inside of the leg. Ta da! they work for my body style.
Now, for the rest of the pics....Can you say Holy Crap, can you believe the fit with no alteration gymnastics!?No wrinkles under the hiney or at the crotch! I forgot how absolutely fabulous the pant fit on Burdastyle were. This past Spring, I did 5 muslins on the Thurow pants because I love that pattern and wanted them to fit me better.
Here are the welt pockets that I did with the big doo-hickey below. The top is the Dritz bound button holer that I bought for about $16.00 on Ebay and the other is a double welt pocket maker from Clotilde. They are super easy to use and make pretty good welts or bound buttonholes. They work exactly the same way and they come with instructions. Collette patterns has a tute on the bound button hole maker. Bound Button Hole Tutorial with Dritz Tool
No money in that pocket...
Anyways, thanks for reading!
Claire
PS: Only if interested: I have a pre-order for some new products this week. I have my best prices on pre-orders BTW. My favorite new product is a measuring wheel in inches that will fit on the Olfa 45mm rotary cutter. Measuring your armholes and necklines are way easier with a wheel than a ruler.
More info at: SA Curve
Monday, July 8, 2013
Floral pants from Burda 07/2008
| My DD in her Burda pants from an old issue and Sorbetto top. |
| The line drawing. |
| The July 2008 issue. |
| Add caption |
Taking advantage of the wide leg trend for pants, my DD came across a pattern she loved from an old Burda magazine issue. She and I are both short which makes wide leg pants tricky. This pattern sports a wide waist yoke and stitched down pleats. I added about an inch on the front pattern piece from the crotch point tapering to the knee. I just cut the seam allowance line to the knee and pull the seam allowance out one inch at the crotch point. This is a great adjustment for someone with a cylindrical body and heavy upper thighs. The floral is rayon from Fabrique here in Plano. It is heavenly. The top is difficult to see in black. DD had me change the front of the Sorbetto to have a one inch window of lace fabric down the center and 2 small pleats on either side (4 pleats in all). The black fabric is from the stash and it is a thin crinkly/crepey poly woven. We have plans for more of these pants, they are just that cute in real life!
Hugs and smooches,
Claire
Friday, June 28, 2013
Ottobre 02/2013 Beckie Dress
| Top stitched almost all of the seams. Not such a good idea for adjusting. |
I thought this dress had a nice shape, but the DD thinks she is too young (17yrs) for a sack dress. I have not hemmed the dress in the photos because she is not so sure about it.
I did take about an inch off the each side from the bottom edge tapering to the waist. I think she will like the next version better if I also take some fullness from the center panel. I think that you will either be OK with the swingy shape or just not do this pattern. I am afraid that removing more fullness might actually make the dress worse. What do you think?
| We love Pete! |
| Have a nice weekend! |
Thursday, June 27, 2013
Ottobre 2/2013 Buttondown and 4th of July Coupon code
| Nice simple blouse from Ottobre. |
| Armhole is a good size. |
| No alterations to the back or front. |
| And...the other armhole. |
I used 5/8ths SA on the sides with flat fell seams,
3/8tns SA on the yoke,
1/4 inch SA on the collar, collar stand, and pocket. I should have done 3/8ths on the collar and stand because I think I just needed a little extra room. There is a portion of my under collar that is not holding so well with the tiny SA, at least it is not noticeable.
The one major change that I did with this pattern is I used 2 yoke pieces so that I could enclose the seams.
Be sure to check out my slideshows of the templates in use.....
I almost forgot! If anyone is interested in my rulers or templates from the Etsy shop I am doing a 20% off through July 4th. It is INDEPENDENCE20
Sewing hugs to you!
Claire
Tuesday, June 4, 2013
Burda Style Shorts 4-2013 #102
| Woops, thread tails! |
I made these shorts for my DD a couple of weeks ago. Precious really likes them. The fabric is a net material with random cotton shapes sewn down. It looks lacey but not really. I made the smallest size for DD. However, she has a cylindrical torso, so I made some adjustments. I added some width to the inner leg, I slashed and spread in the center of her thigh upward and let out the side and front above her hips. These are typical adjustments for her. The one major change that I did on this pattern was to eliminate the fly front and just use an invisible zip on the side. I am just lazy like that.
The pattern called for a lining fabric used like an underlining. I thought that in no way was I wrestling with slippery lining fabric for a pair of shorts that will probably be only worn one summer. Sooooo, I just used some white poly cotton sheet looking fabric in my overflowing stash as the lining.
Easy squeezy shorts!
Hugs and smooches,
Claire
Subscribe to:
Posts (Atom)