Wednesday, December 19, 2012

Sewing Room and new Facebook surprise!

Above the cutting table

As you walk into the loft. To the right is a doorway into a small bedroom (sewing room)

Left wall of the loft.

Looking from the loft area to the small sewing room.

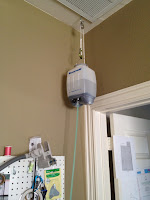
Pulley for the water tank.

Above the ironing board.

To the left of the ironing board. My missing sewing machine is being serviced.

As you enter the small bedroom.

Looking to the right in small bedroom.

Where I am right now.

To the right of the computer.
First wall and stash closet as you enter the small bedroom.


Believe it or not, I have cleaned this area up quite a bit.  My sewing machine is getting its yearly checkup and I have been missing it so much. I guess this is proof that I love notions and thread and am a bit of a pig. Anyhoo, I have put a Facebook page for my rulers and templates. On the left of this blog is a link where you can like my page.  I am going to use it to announce coupon codes and possible new products. I am thinking about buying a case of those huge ziplock bags for my Jalie patterns and pattern magazines and medical exam paper. So if this would interest you, let me know.  I will totally keep the prices down on those items. My sticking point with the paper is how to package and ship cheaply. I do have a surprise offering coming up soon, so be sure to go and like me!! Because I like you ( I couldn't resist :) )

Happy Day to you,

Claire

Friday, December 14, 2012


Well, looky what I received from Art Attack!  How cool is this! I am so excited to share some of my favorite bloggers too.   Art Attack is one of my absolutely favorite bloggers. I think I buy almost all of the patterns she shares on Pattern Review because she has such incredible style and I want to be just like her!  ;) Vogue definitely needs to hire her.  She is my sewing heroine too!


My nominees are Anne with Petty Grievances. Because she is probably the funniest sewing blogger that I know of.  You have to visit and sign up for her posts, you will adore her like I do.  She only uses prints, never open toed shoes and she loves Disney. 

Another incredibly talented and funny blogger is Fit for a Queen. Who can't love a seamstress that names her recent title, "Hoochie Mamas and Hems"? Not only do I learn so much from her but she is the queen of alterations.

21 Wale is a wonderful sewing blogger.  She is the mom of five and sews a ton.  She holds a special place in my sewing heart because she was one of the first to belong to my blog.  She also loves Ottobre like I do.

Kadiddlehopper is another great sewing blogger.  I subscribe to her Flickr sewing mail and she is also KidMD on pattern review. She not only is a wonderful seamstress but a mom and a pediatrician.  Whew, her life would be like stepping into a tornado.  
  
Blue Mooney  I have actually met in person. She, like myself, is part of the huge Dallas -Ft Worth Metroplex. Not only is she a super nice person but she is a fabulous resource for shirt making and other sewing endeavors. She has started back doing illustrations and I adore her sewing ones.     

Speaking of shirtmaking, if you do not already know about Pam's Off the Cuff Style sewing blog, you are in for a treat. She has the best shirt making tutorials and truly the best interfacing out there. Pam, may not know this, but a couple of years ago, I emailed a pdf of my first SA Curve ruler. When she replied positively, I was totally going to jump off the deep end and make my rulers. 
      
 Shirley Ann's sewing blog.  Shirley Ann, is one of my best online sewing friends. She loves Jalie and Ottobre like I do! She has one of the best organized blogs that I have seen.  Check out her son's cargo-type pants, they are soooo cool!

Last, but certainly not least, is Dixie DIY.  If you have not visited Dixie's blog, you are in for a treat. She has loads of style and the most amazing bra making resource on her blog.  I am dead to try her patterns, they are sooo cute.  She is also a fellow Texan and I know she keeps this heat in mind when she sews.


The last of the requirements of this award are to list 7 things about yourself. 

1. I adore sailing in high winds.  Otherwise, I am a pretty tame person.
2. I started sewing regularly about 10 years ago.  I thought I would make a shower curtain for my weird accessible bathroom (son) and was talked into a serger too.  Oh my, I loved that serger and just kept making any and everything with it.
3. I was making blanket ponchos (I will never make another poncho again) for a friend who needed samples for a QVC adventure and realized he may know how to get my rulers produced at a reasonable price. 
4. I play the piano.  I have played the saxophone, flute, and drums in a school band. I wish I could sing.  My daughter is now the resident vocalist.
5.  Some of my college (1985) was spent at the University of Vienna. Oh how I would love to go back there.
6.  My brother in law is an unbelievably amazing professional Clown.  He is called Tharpo of All Occasion Performers.
7. This is for Art Attack because of her survival training with her sisters(so funny).  I have 3 brothers and my dad used to take us to learn sailing on a very small Butterfly sailboat.  I think we were all pretty worthless at it and I do have some funny memories of that time.
                              

1. Thank the person who nominated you (THANK YOU ART ATTACK!!)
2. Add The One Lovely Blog Award / The Very Inspiring Blogger Award to your post.
3. Share 7 things about yourself.
4. Pass the award on to 10 nominees (or a few less if you are short on time)
5. Include this set of rules.
6. Inform your nominees by posting a comment on their blogs.

Thursday, November 22, 2012

Kwik Sew 3807 Leggings


Here is my daughter wearing the Kwik Sew leggings. She wanted this legging pattern because of the cute zip on the leg.  The ones I made here are sans zip.  Yes, those are a magazine print in cotton lycra from Fabric Fairy. I thought, cool, when she is bored she can just read her legs.  You can tell I am almost 50 and she is almost 17. This is a a one pattern piece pattern.  It is super easy and absolutely no problems with any of the construction. She is wearing it with black shorts in the pic and a tunic top from Aritzia (her fav store), Modcloth jacket and her itsy bitsy Coach purse. She is 5 foot 2 inches and about 108 pounds.  I made the extra small for her.
If you need a legging pattern that is super easy and great fit, then this is a good choice.
Happy Sewing


Claire

Sunday, November 11, 2012

Vogue 8565 and Simplicity 2181


This was my attempt to mesh two patterns together. I like the outcome, but I will be doing this differently on my next one.
The Vogue is out of print and I believe Style Arc has a similar tee. I can tell you how I think you can make this without those two patterns, because I am going to try this again without either of these patterns.  On this top, I used the sleeves from S2181 and traced the front portion of the armhole to the front pattern piece and the same for the back.  After I sewed this up, the shoulders were to wide. I fixed the cap by sewing it deeper into the body which gave medium results. This is the reason the next version will be with a TNT like Jalie, Kwik Sew or Ottobre's basic tee.  ( more on my hypothesis later)

Changes besides the sleeves,
 Lowered the neckline by 2 inches
Neckline with self fabric:  See my video on how to put on a knit neckline without measuring.
Lengthened top by 2 inches

What I will do next time, or if you do not have this OOP Vogue:

I will take a portion of my knit fabric designated for the top and sew down the pleats.  These pleats are marked 1 inch apart and 9 inches long. They are sewn down with 1/4 inch seams. The pattern has 12 pleats going to the center, mine are all going to the left and 11 pleats.  Then I will lay my front pattern on top of this and cut it out. That way the sleeves will match the pattern used.  I guess you could also spread your TNT top pattern 12 inches out for the pleats if you are using a one layer pattern front.

If anyone has done this similar to my above hypothesis, let me know if it worked out or should I do something different.

Happy Sewing!

Claire


Friday, November 2, 2012

Simplicity 2181


This is a great little tee pattern. I made a size 14 and straightened the side seam a little.  My waist is not too little anymore.  Anyhoo, my daughter said that it was slimming, therefore it is my new favorite top.  I am wearing it with some Jalie jeans that I made.  I won't show you the waist of these jeans because I had to put some elastic in them so they would stay up.  The tee has a large front facing that I accidentally omitted. Once I had the front twist done, I skipped the instructions. This pattern needs a facing for the neck so I just copied the back neckline and added 2 1/2 inches in width. I cut the front facing 2 1/2 inches wide and joined it to my back facing at the shoulders then attached it to the neck hole. I understitched the facing and then coverstitched it down about 1/2 inch from the edge.  The next one is going to have an inch in length added.  I am 5' 2" and it just seems short to me.  No other fitting adjustments were done.  I wish I had done a little more matching work on the stripes, but I'm not sure I am too bothered by that.  It was fun, easy and flattering!
Have a nice weekend!!
Claire

Friday, October 26, 2012

J Stern Jeans

I tried to over expose this dark pic....

Inner leg seam that was flat felled.  This is after one wash.

Husband said to suck it in! (ha)

Back of the jeans.

UPDATE:  I forgot some information that is handy.  Jennifer Stern recommends washing and drying your yardage 5 times before cutting out. This really made sure the jeans were going to fit later. Also, she mentioned AK fabrics for denim out of NY and even though this pair is not from there, I have bought 8 yards of denim and loved every one.  Their medium weight is heavier than what you might think.


I went to the ASG convention in Houston back in August.  I took Jennifer Stern's all day jeans fitting class. I have also been making some Jalie Jeans too. (total 6 pair)
Jalie fits me pretty good out of the envelop like most people. My thighs are a little large for Jalie and I added the J Stern fit issue to that pattern.

 So, here are my fit changes:

Regular rise adjustment: Added 1 inch to front and back pattern piece.
Crotch length adjustment: Cut the lengthen/shorten crotch length line all the way across and pulled the top of this pattern 1/2 inch to the back (or side seam).
Crooked side seam adjustment: My thighs are a bit thick, so we added 1/2 inch to the front side seam and it made the pulling of the side seam on my leg straighten (yay!)>
Yoke: We pleated out the fullness with tiny darts and adjusted that pattern piece.

These jeans run small and they are designed for non-stretch denim.  I went up 2 sizes from my measurements. The above jeans are stretch and I just took them in 1/2 inch on both sides.

What I really like about this pattern are the amazing instructions. It also has cute pocket flaps. She has 3 different seam allowances. 3/8th for things like the pockets. 1/2 inch seam allowances throughout most of the pattern.  This is super for making wider parallel top stitching. She uses 3/4 inch seam allowances at the yoke and the inner leg to accommodate the flat fell seam in those places.  I have added those design changes to my Jalie pattern. She also has a contoured waist band or straight if you prefer. She even tells you how long to make the stitch length for top stitching. Back pocket location instructions include how far from the yoke on the inner pocket corner and outer pocket corner for placement.  I wish all pattern makers would give inch information on placements and rectangular pieces (like Burda WOF).
My absolute favorite aspect of these jeans are the leg.  I have tried making a Jalie/J Stern frankenpatterns with what I like best of each.  I am still going with 2 separate pairs.

My timesaver: No double needle and I used regular thread.  I lengthened the stitch (topstitching) to 4.5 and I used a double stitch on my Viking.

There you have it!

Claire

Thursday, October 25, 2012

The Corset Belt


The corset belt from an old Burda magazine.  I was going to teach my daughter how to sew and this is what she picked out.  I went ahead and finished it because her hands hurt to cut out anything, even paper. It was a quick and fun little project. I traced 3/8th inch seam allowances with my handy-dandy seam allowance ruler. I used bits and pieces from denim and upholstry fabrics. I sewed the fabrics of  various widths together. Then, I just put the pattern pieces on this pieced together fabric and cut them out. We did add some red piping between the two front pieces.  It needed some color. The outer fabric is interfaced with a medium woven fusible.  It is also lined with a Bemberg type lining. The 3 ribbons on each side are attached in the back and then just pulled to the front and tied in a bow. The only adjustment I made was to cut off  3/8ths of an inch from the lower edge.  It was just a wee bit too wide for her small frame. Plus, I told her it would look like a small apron if I did not do something about its size (ha).  We both think that it would look really cute with a simple dress. Next one, I will probably add some boning in the back where the ribbons attach or maybe some heavy interfacing at the ends.
I guess this is why I like sewing for my daughter. At 16, she always has an oddball project she dreams up  that somehow seems to look pretty cute on her.

Hugs and smooches from me to you!

Claire